How to Build a Backyard Ice Rink (Step-by-Step Guide)
If you’ve ever stepped outside on a cold Minnesota night and thought about having your own rink in the backyard—you’re not alone.
A backyard ice rink turns winter into something you actually look forward to. Morning skates, late nights under the lights, weekend with family and friends—it’s hard to beat.
The good news? You don’t need a perfect yard or professional equipment to make it happen.
In this guide, we’ll walk through exactly how to build a backyard ice rink step by step—based on what actually works in Minnesota winters.
Step 1: Choose the Right Location
This is the most important decision you’ll make.
A great rink starts with:
Flat ground (the flatter, the easier everything else becomes)
Good drainage
Some sun exposure, but not all day
Protection from wind if possible
A little slope is manageable, but once you get beyond a few inches of grade, it gets much harder to build and maintain good ice.
👉 Pro tip: Snow melts faster in sunny areas, but the sun also makes winter days more enjoyable. There’s a balance.
Step 2: Decide on Size and Shape
Most backyard rinks are:
20’ x 40’ (small, easy to maintain)
30’ x 60’ (great for families)
40’ x 80’ (closer to a true hockey feel)
Bigger isn’t always better.
Larger rinks:
Take longer to fill
Require more maintenance
Are harder to keep smooth
Start with something manageable—you can always go bigger next year.
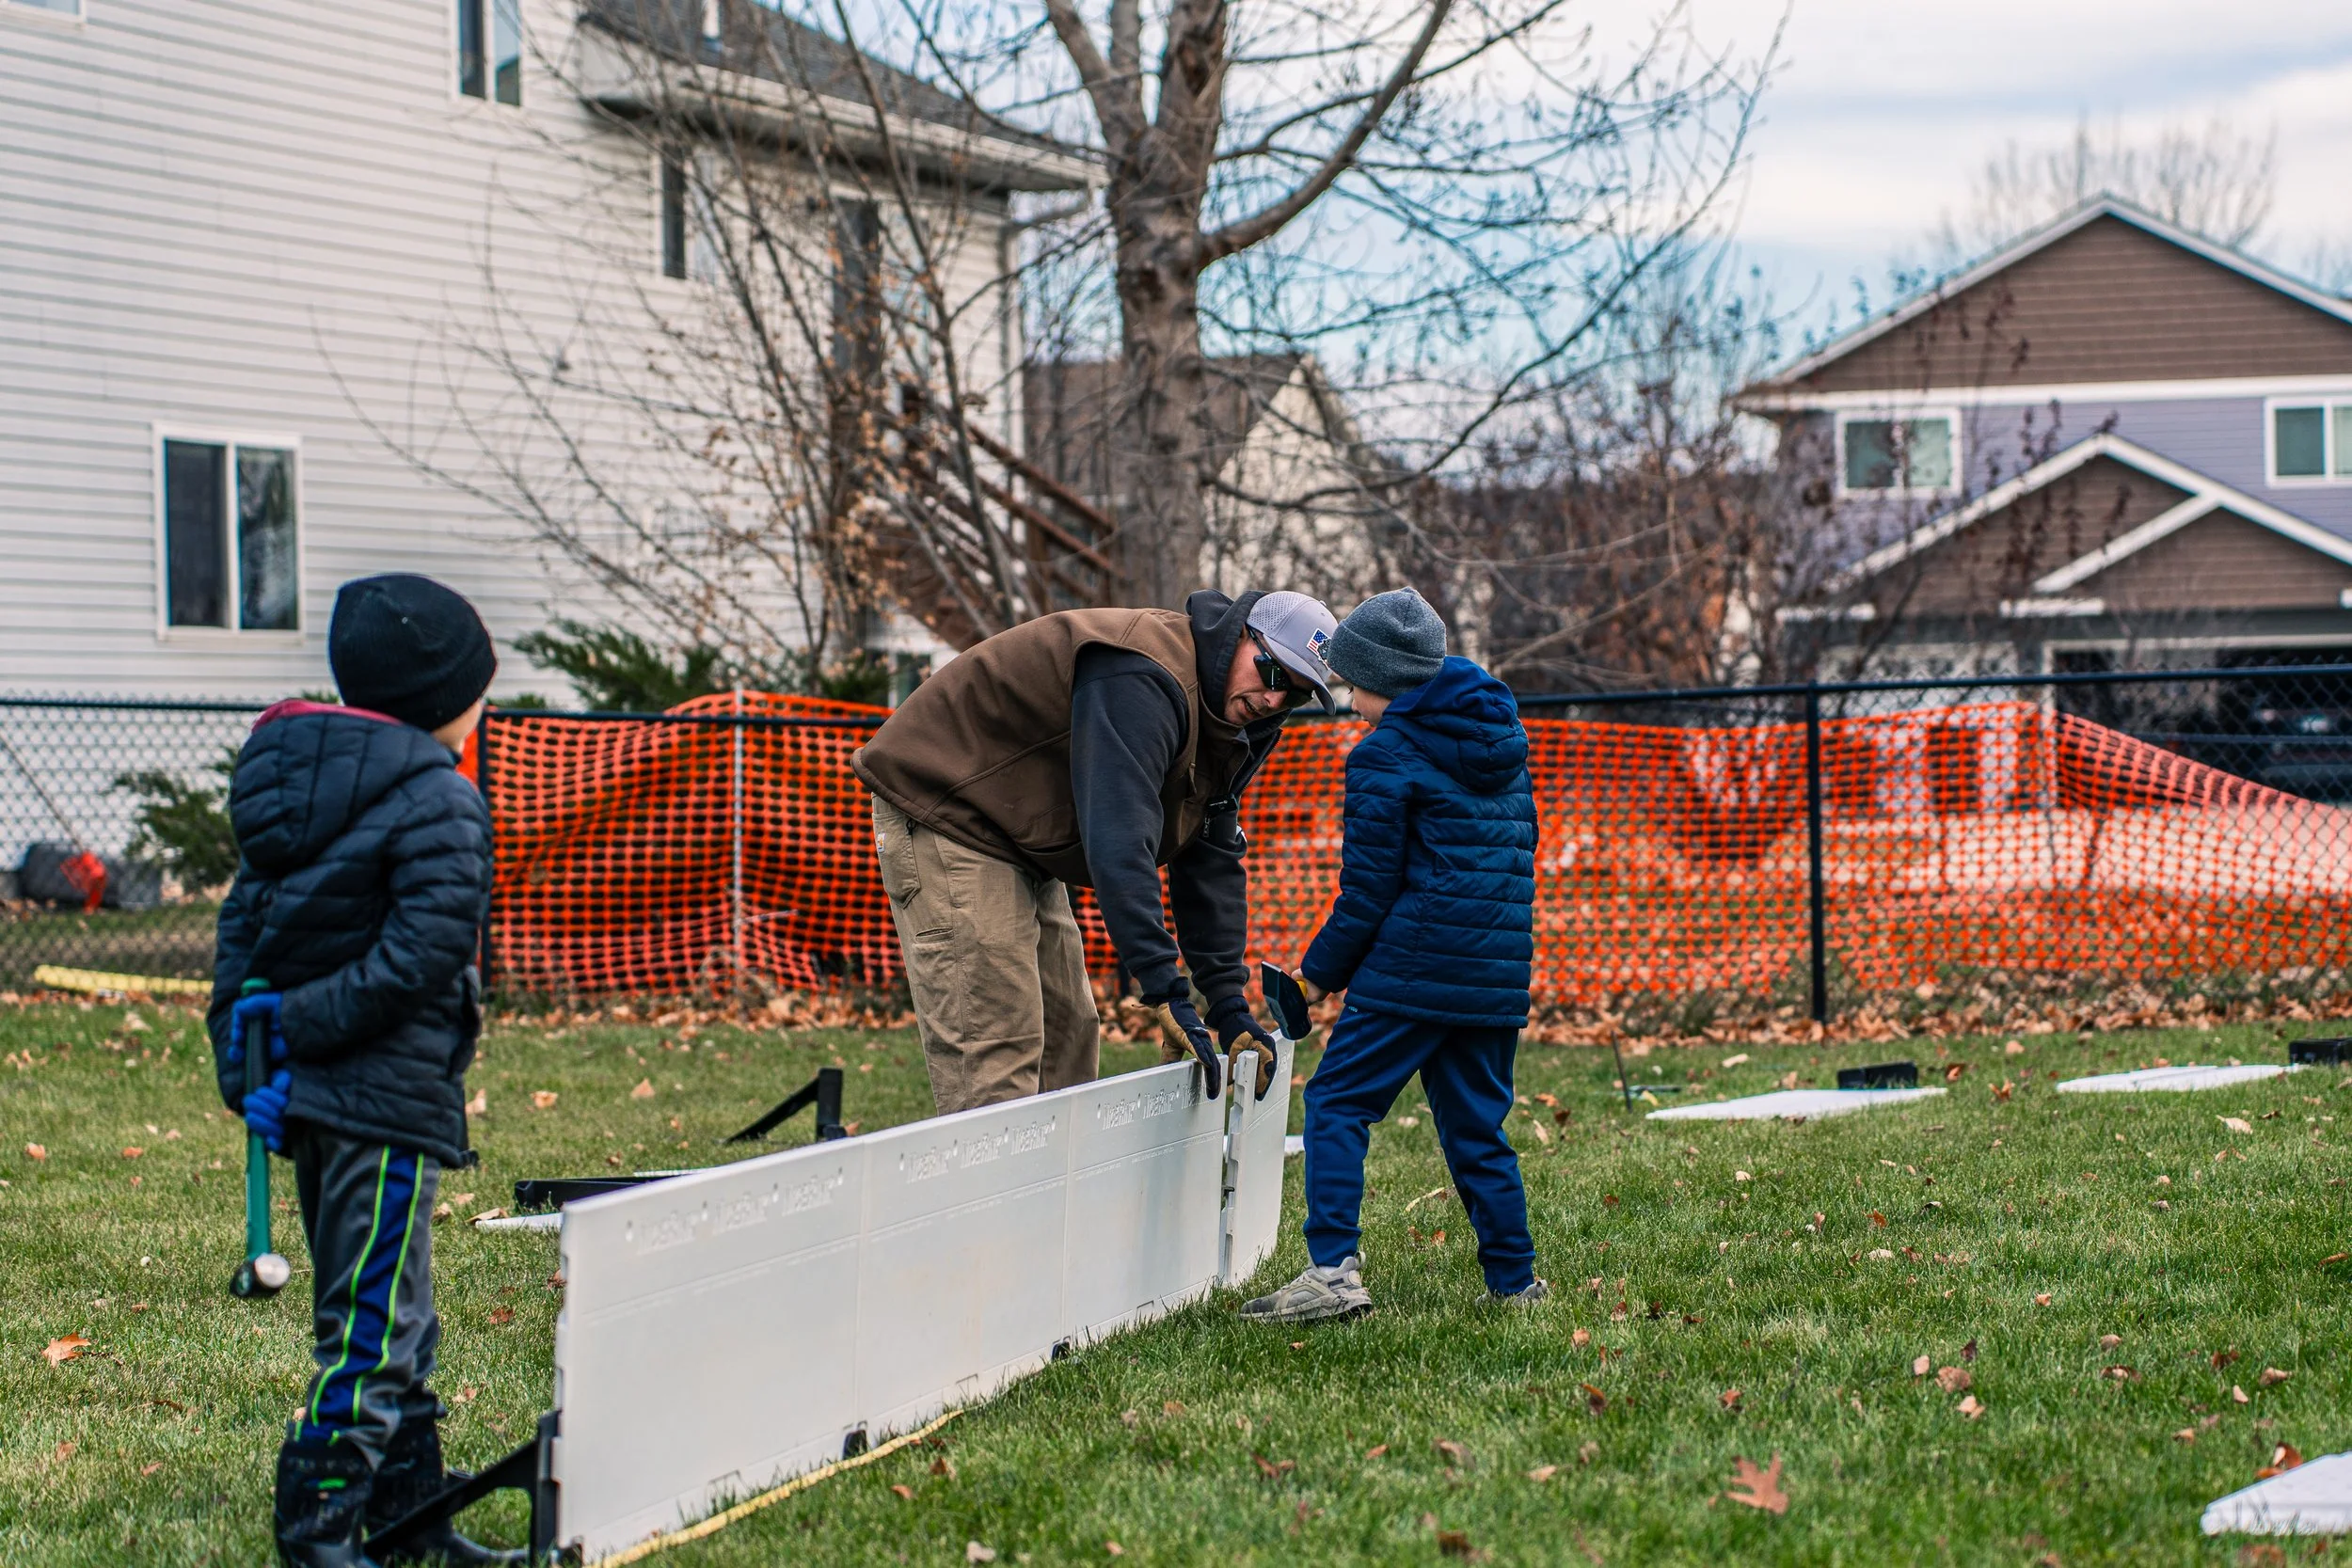
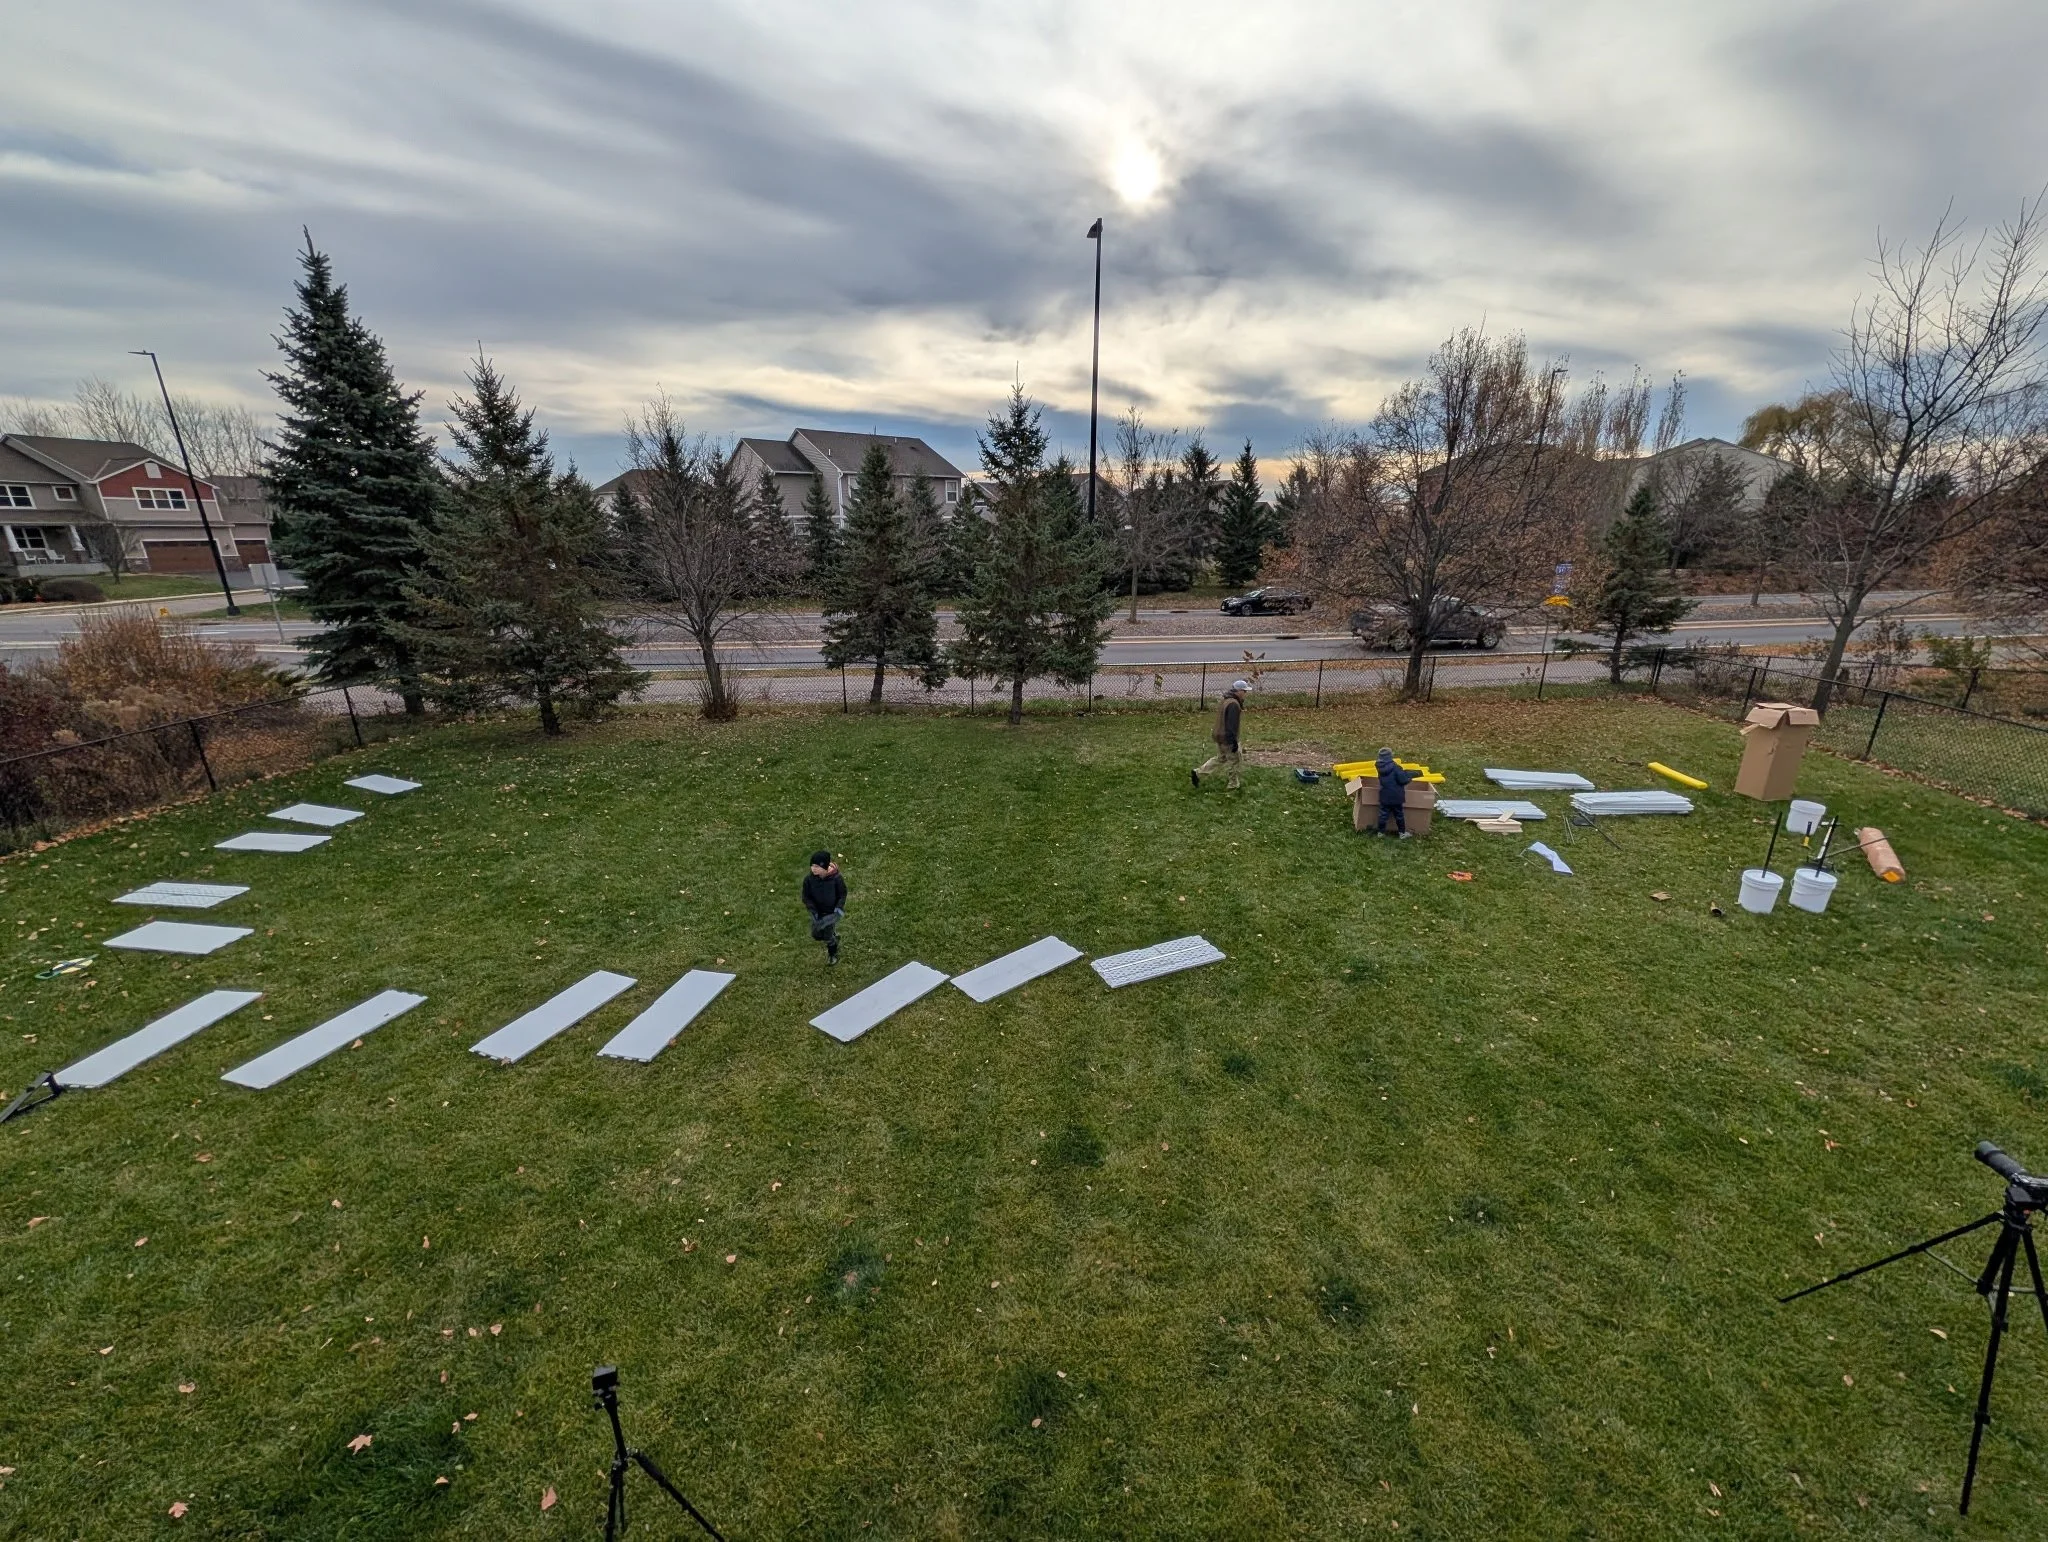
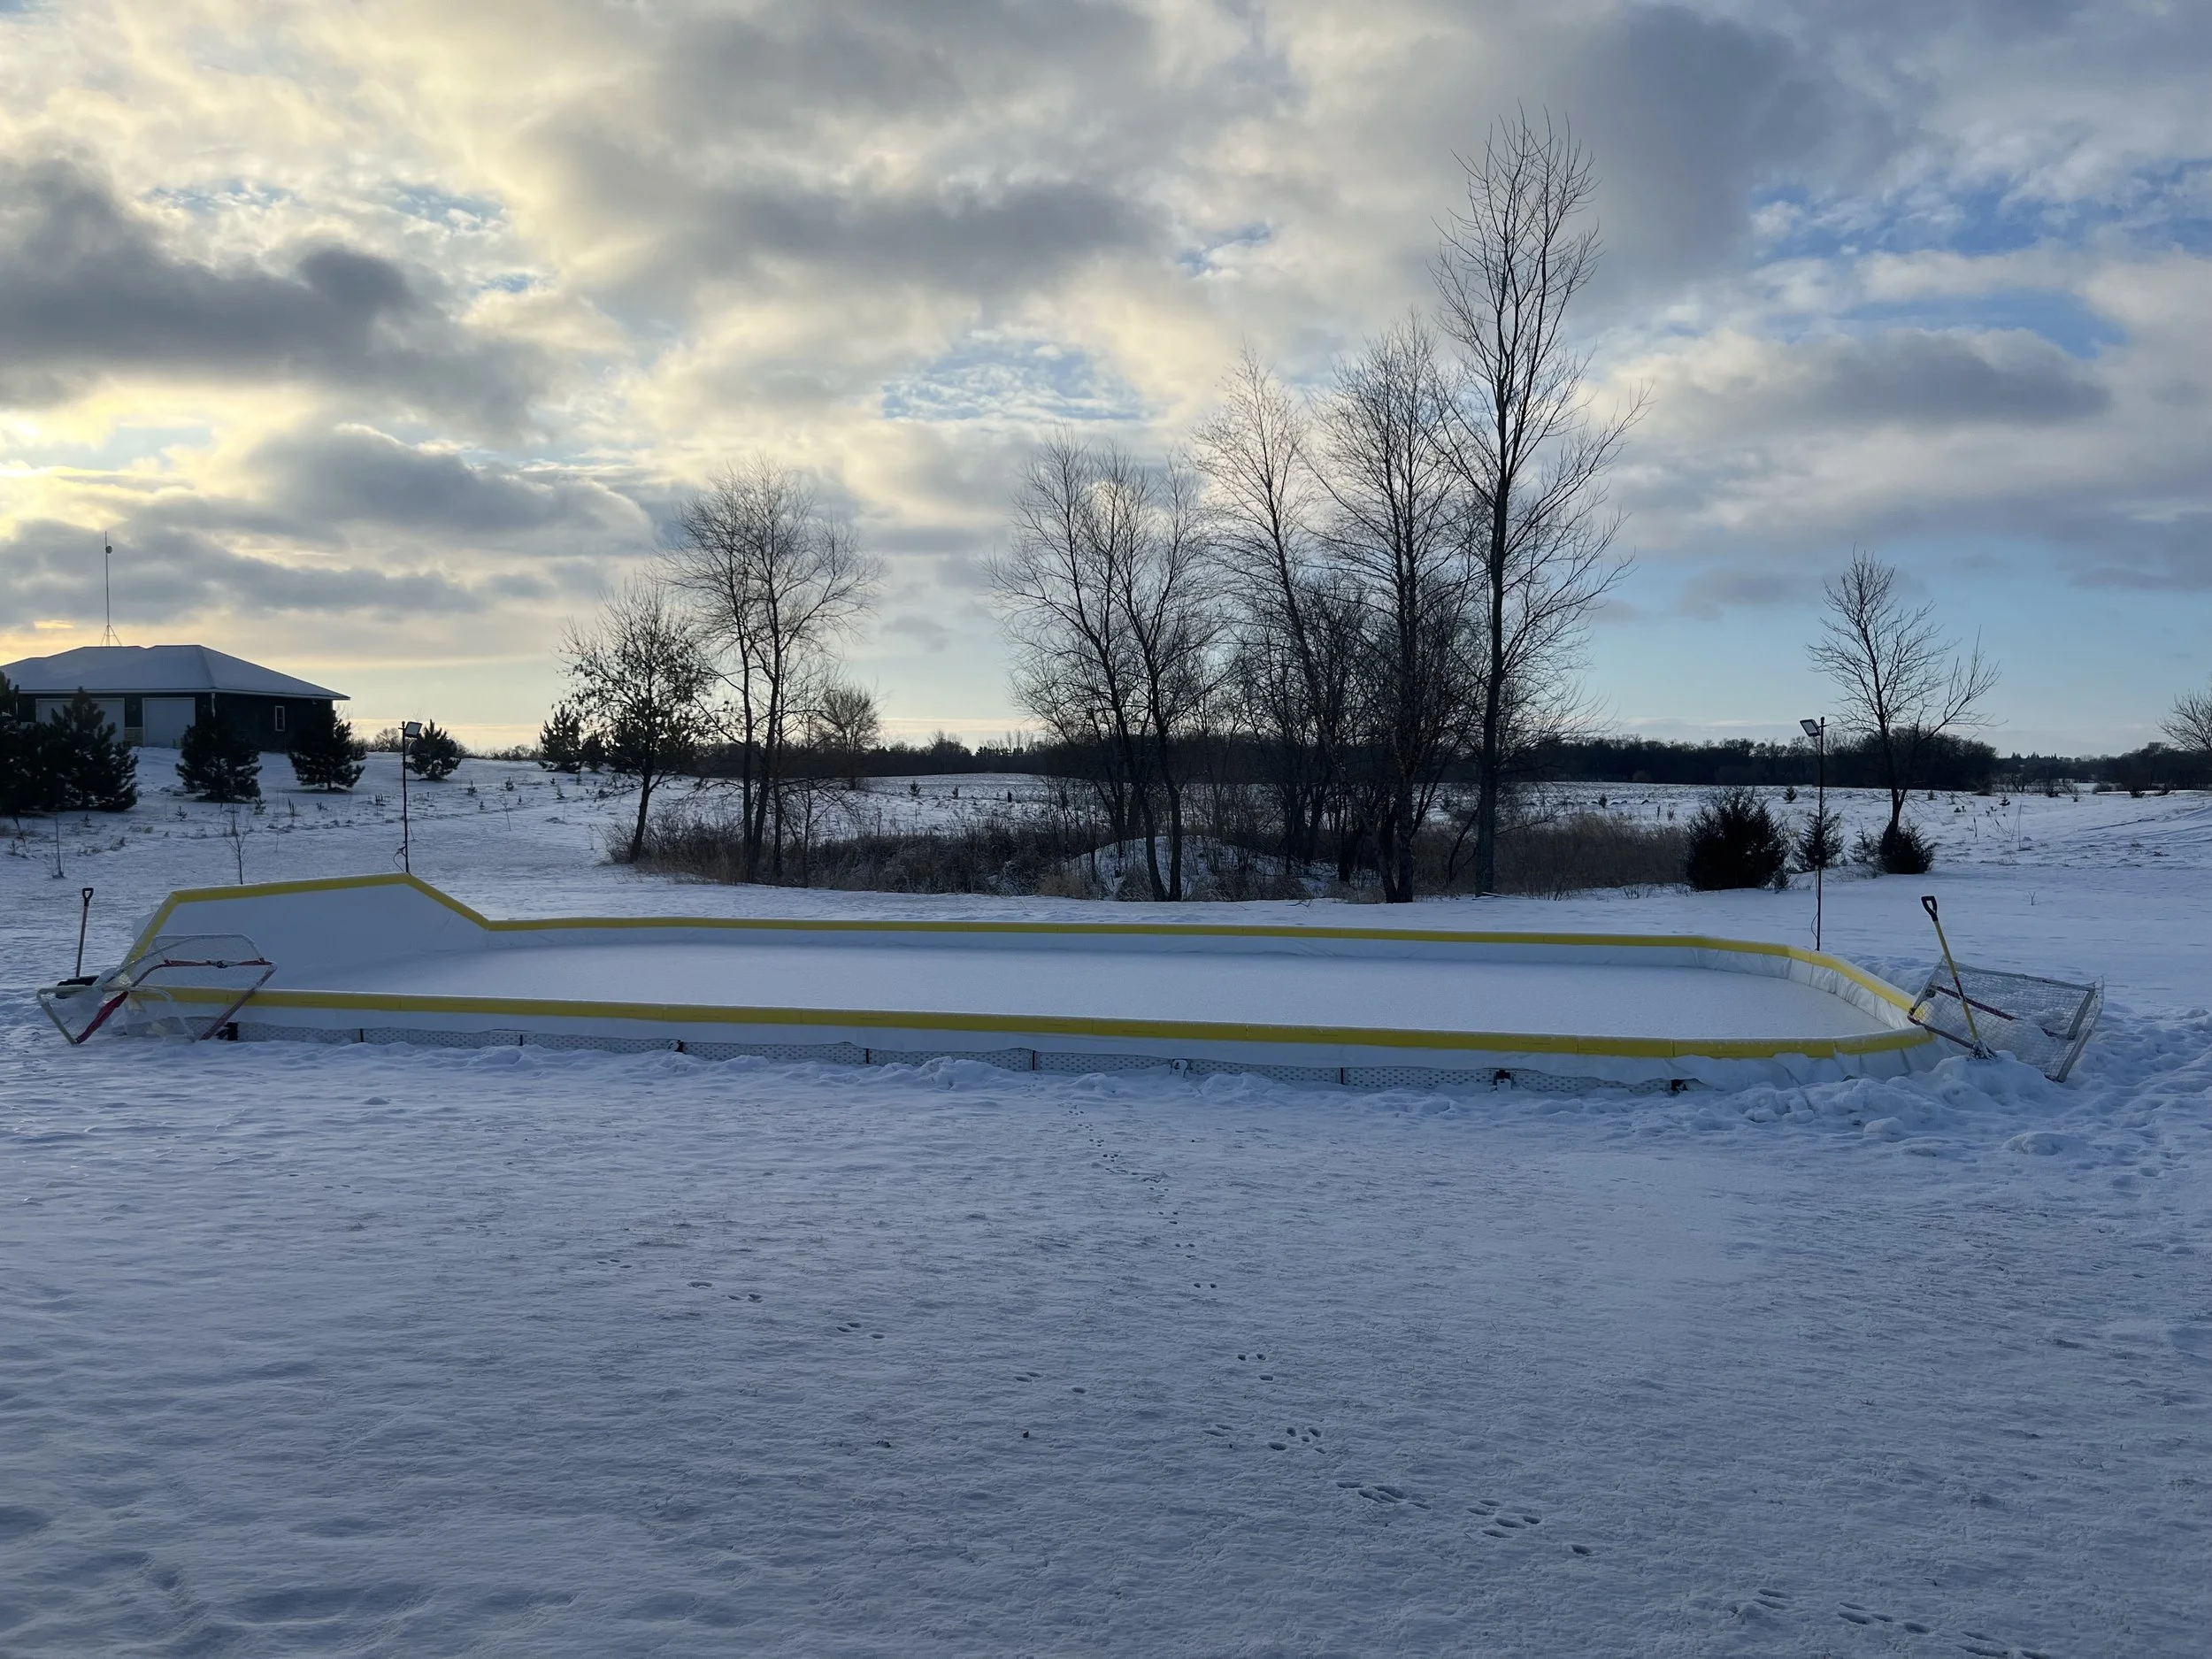
Step 3: Build Your Rink Frame
Your rink frame holds the water in place, and the material you choose will impact how easy your build is—and how well your rink holds up all season.
Most backyard rinks use one of three options:
Plywood – a budget-friendly option that can work for smaller rinks, but may bow or wear out faster
Solid lumber (2x6, 2x8, etc.) – the most common DIY setup, offering a good balance of strength and cost
Rink kits – pre-designed systems that are easier to install and give a cleaner, more professional result
No matter which route you go, the process is the same: lay out your rink, set your perimeter, secure it with stakes, and level it as best you can.
👉 Want help choosing the right materials? Check out our full guide: Best Materials for a Backyard Ice Rink
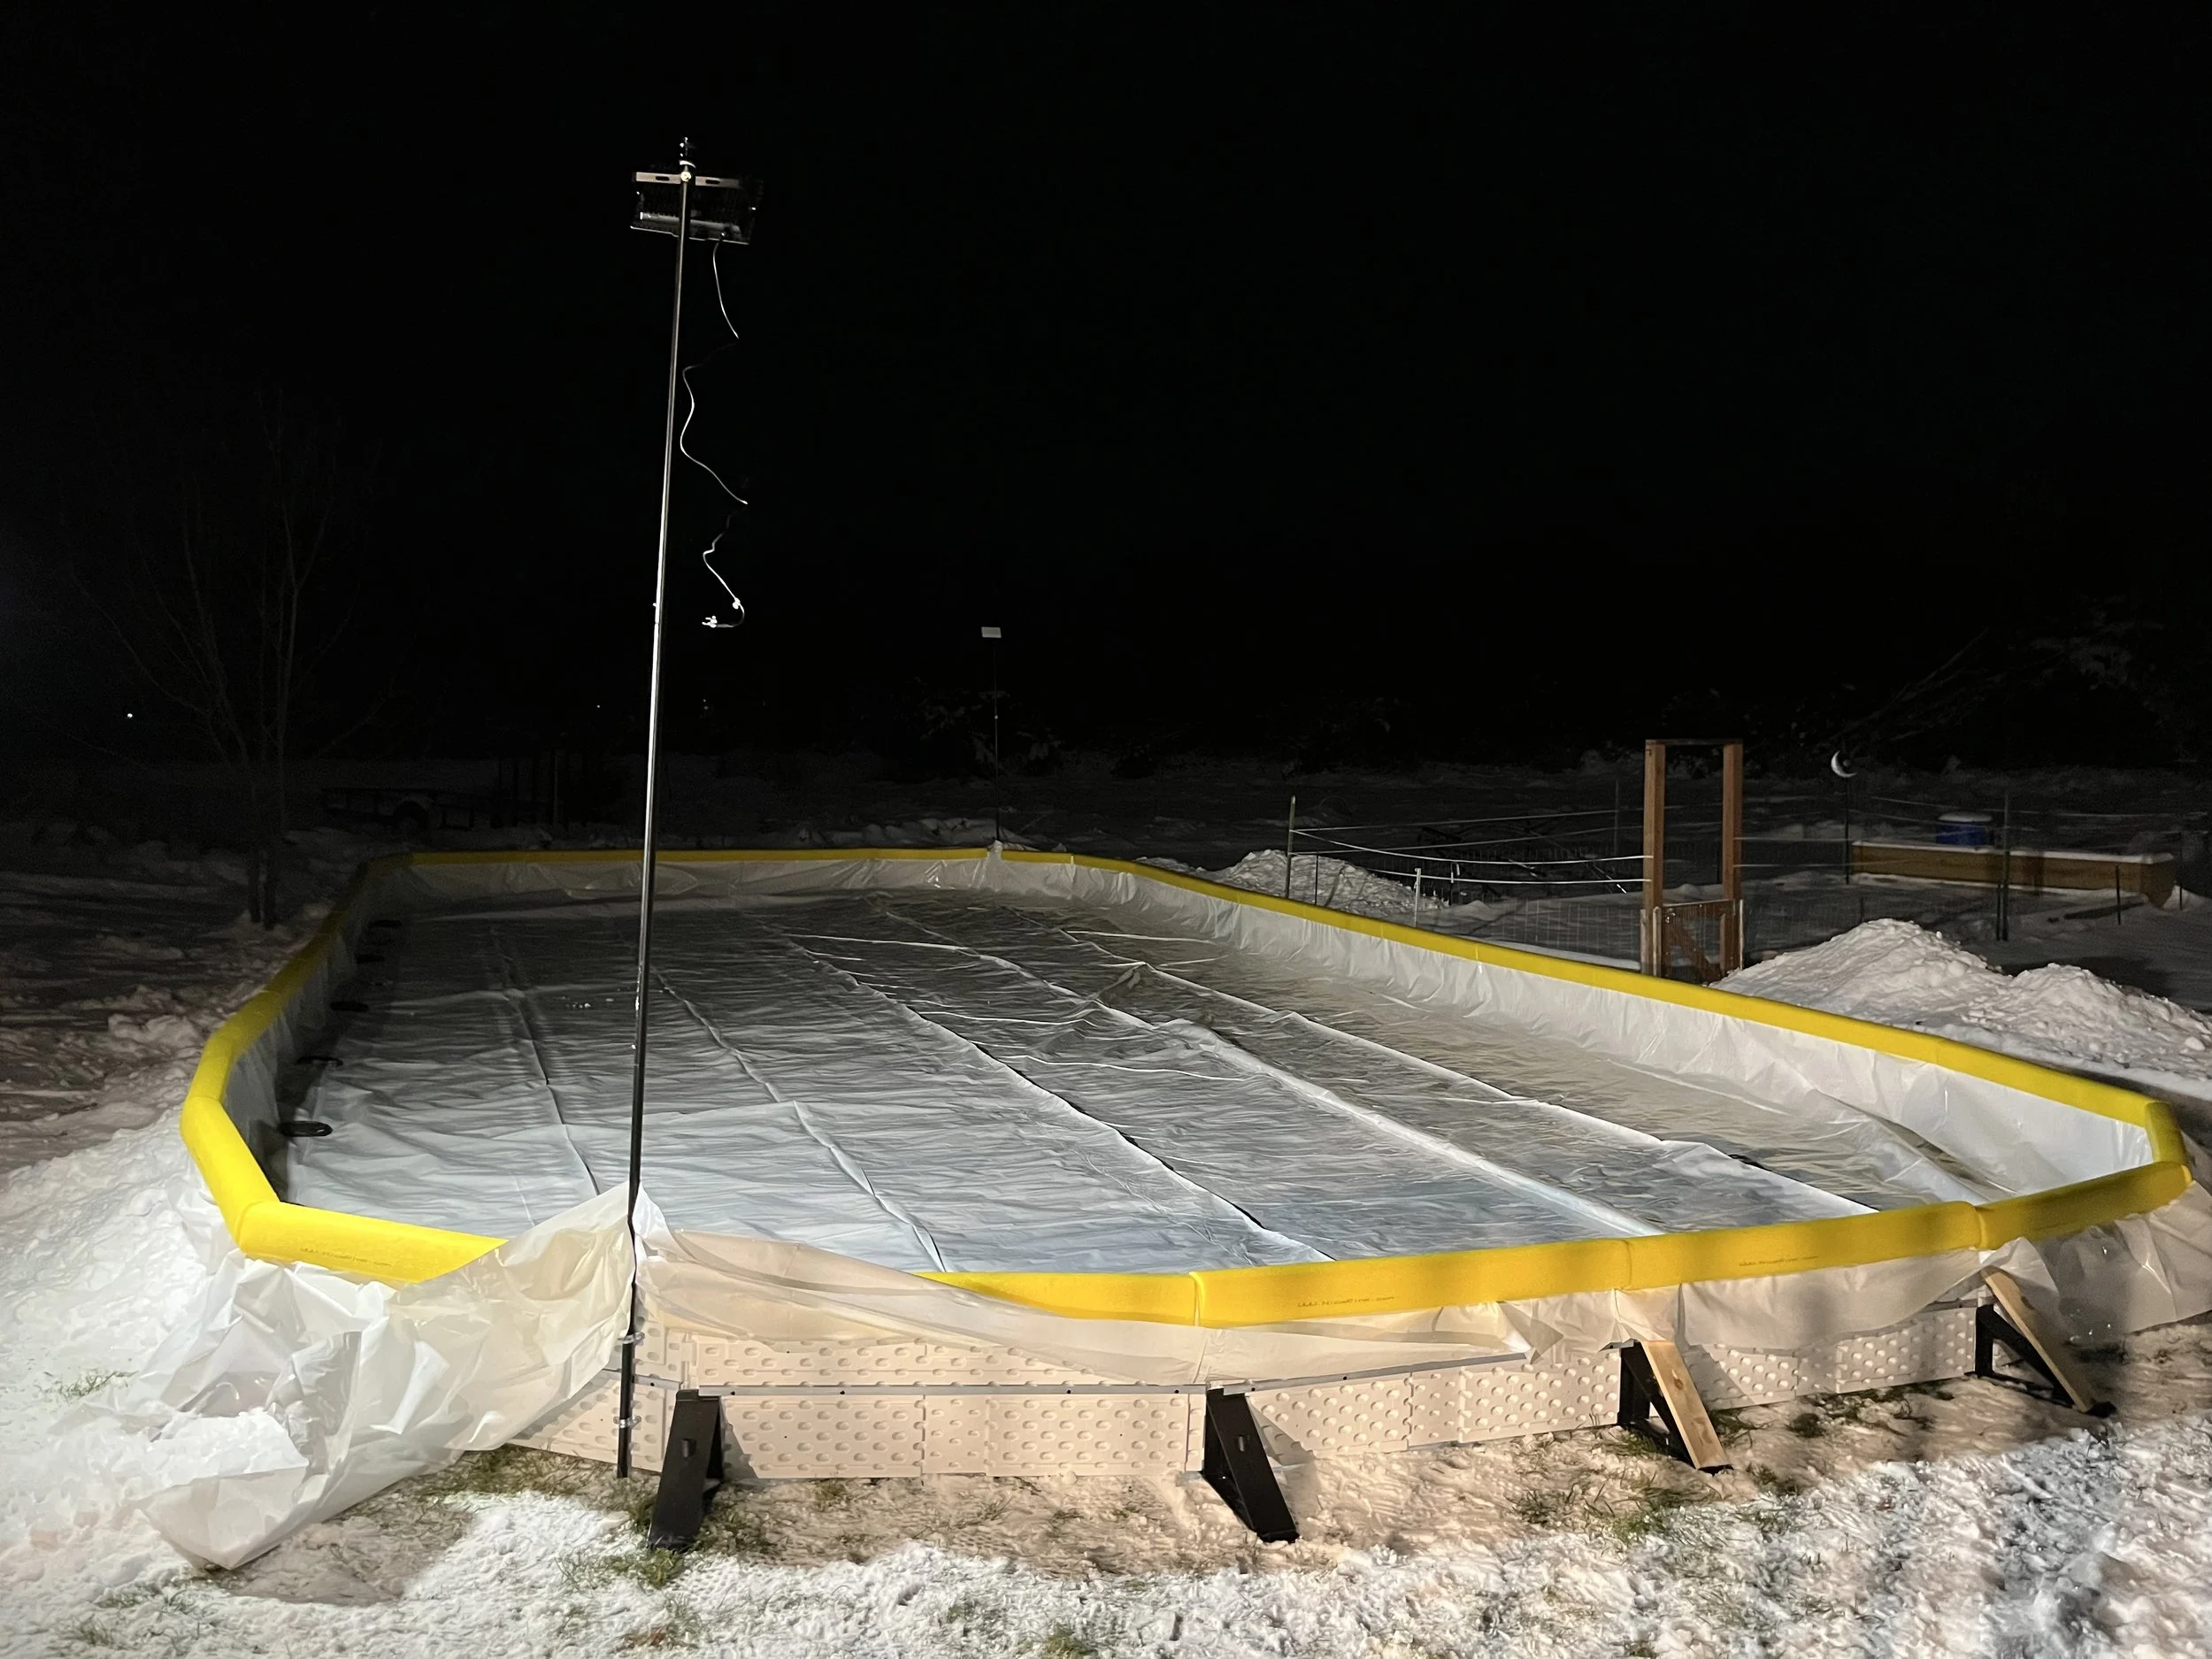
Step 4: Install the Liner
The liner holds the water and creates your ice surface. Only install you liner when you are ready to fill it.
what size liner do you need:
A general rule of thumb is allow an extra ten for both length and width
Most companies will add the extra length when you buy your liner
When installing:
Lay it out carefully
Avoid sharp edges underneath
Leave extra material around the edges
Take your time here—tears or weak spots will cause problems later.
Step 5: Start Filling with Water
This is where it starts to feel real.
Best practice:
Once you start filling do not stop until you have at least three or four inches in the shallowest part
In Minnesota, ideal conditions are:
Temps consistently below 30°F
Calm weather (wind slows freezing)
No precipitation. Rain or snow during the initial freeze can result in rough ice
Don’t rush it. Thin layers freeze stronger and smoother.
Step 6: Maintain Your Rink
This is what separates a good rink from a great one.
Regular maintenance includes:
Shoveling snow quickly (snow will adhere to ice and be harder to remove later)
Flooding thin layers to smooth the surface
Fixing cracks and rough spots
After snowfalls, try to clear the rink as soon as possible.
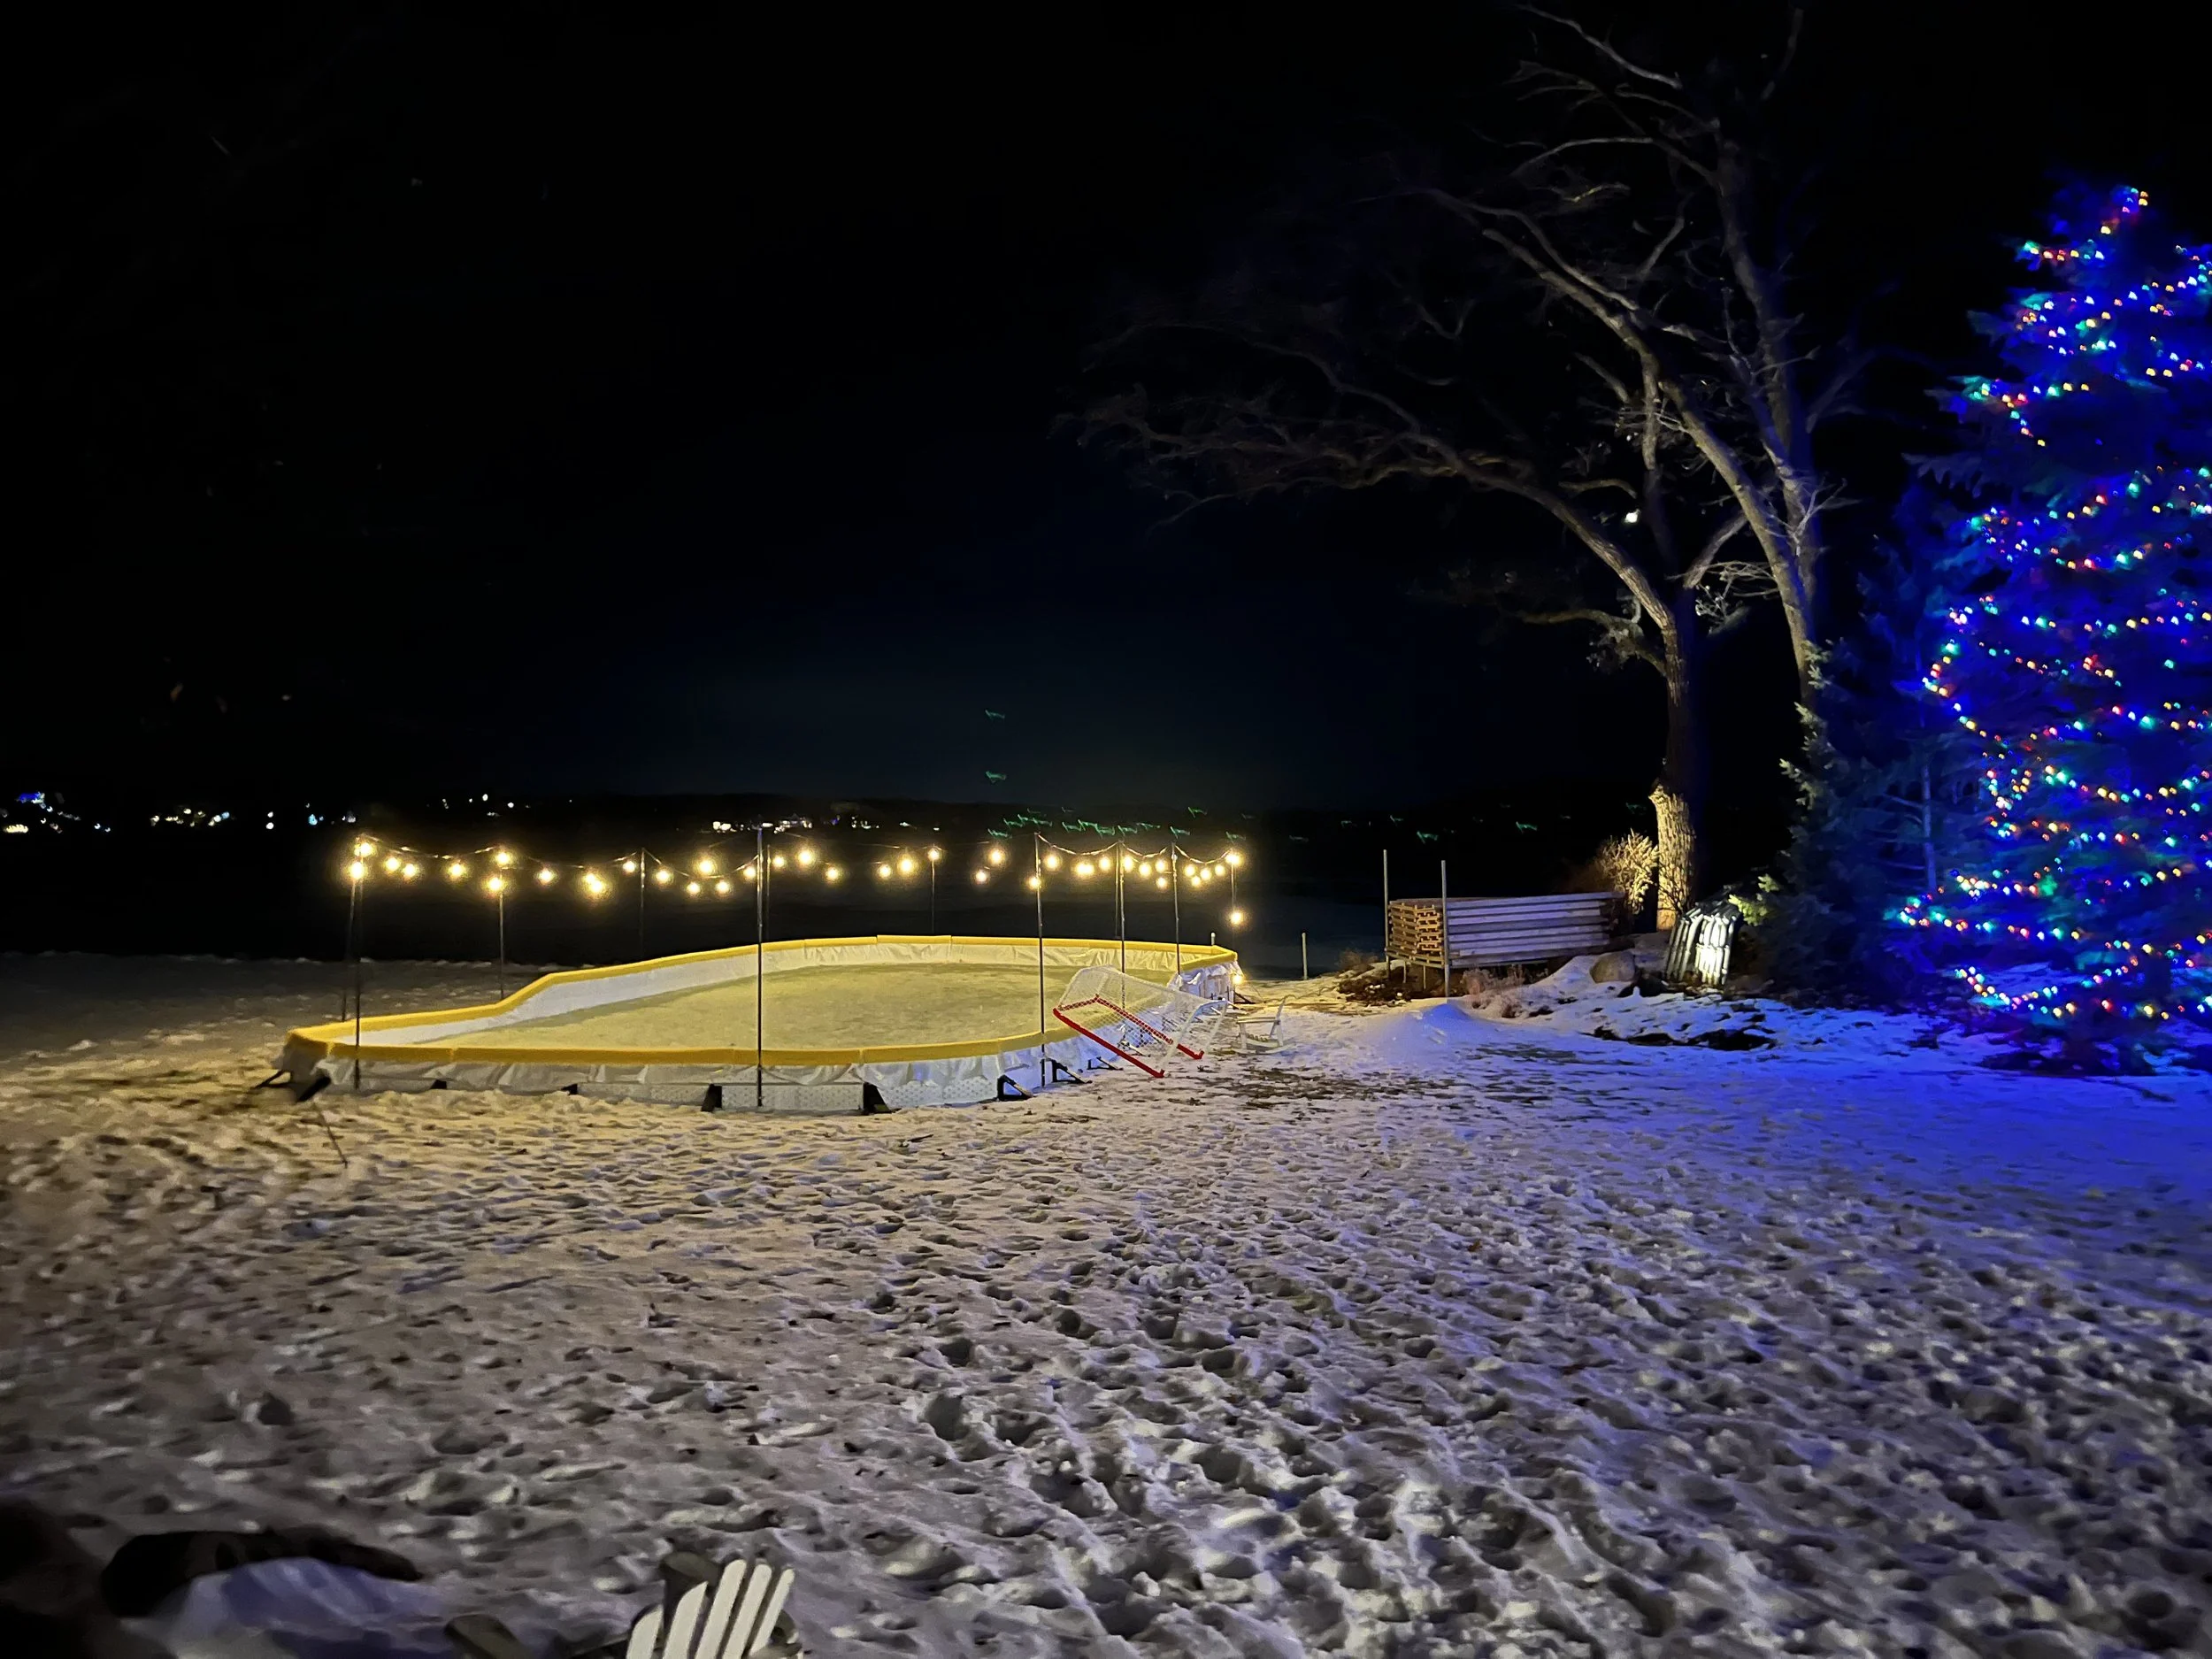
Step 8: Add Finishing Touches
This is where your rink becomes something special.
Consider adding:
Lighting for night skating
Firepit
Benches or a small hangout area
Music (underrated but makes a big difference)
These details turn your rink into a place people want to be.
Common Mistakes to Avoid
A few things that trip people up:
Choosing a sloped area (always verify slope with laser lever)
Not clearing snow before flooding
Letting snow sit too long
Going too big for their first year
Most problems come down to rushing the process or underestimating maintenance.
How Long Does It Take to Build a Backyard Rink?
Typically:
Setup: 1–2 days
Initial freezing: 2–5 days (depending on weather)
Final touches: 2-3 days (you are skating during this time, but still perfecting the ice)
After that, it’s all about upkeep.
Is It Worth It?
If you enjoy being outside in the winter, it’s one of the best things you can do with your backyard.
A rink isn’t just something you build—it’s something you use almost every day when conditions are right.
Want Help Building Your Rink?
Building a backyard rink takes time, effort, and the right setup.
If you’d rather skip the trial and error, we can help.
At Polar Bear Rinks, we design and install backyard rinks built for Minnesota winters—so you can focus on enjoying the ice instead of figuring it out.